Marketing Funnel Module | SharpSpring Module
Email Marketing Automation is Easy with
SharpSpring and THE RICH Agency
Email marketing campaigns are one of the most cost-effective ways to acquire paying customers, increase engagement with new leads, and even reduce churn rate while increasing retention.
In fact, research from the marketing blog Optinmonster reports that companies just like yours achieve an average ROI of $44 for every $1 spent on email marketing.
These types of results are most easily achieved when you’re not just sending out email blasts to a list, but using a professional email marketing automation solution like SharpSpring, which among all the great features I will present on this page, support your company to build the focus marketing funnel to the right leads on their life cycle stage.
SharpSpring takes both the guesswork and busywork out of email marketing and helps you deliver the most targeted content to your email leads at the times they’re most likely to take actions such as fill out a form, watch a YouTube video, or convert to a paying customer.
How Does SharpSpring Work?
SharpSpring is so effective at email automation because it’s an entire marketing automation platform (MAP), SharpSpring tracks all your email leads’ interactions with your company from:
-
The first time your leads visit your website.
-
The entire time leads are in your sales funnel considering a purchase.
-
Well after your leads have purchased by emailing them relevant content to foster your relationship with them.
Because SharpSpring is with you from the very beginning and forever thereafter, the platform tracks your leads’ habits, determines exactly where they are in your sales funnel, and automatically sends them targeted email content at the exact times they’re likely to take steps towards purchasing, recommending your company to others, and more.

SharpSpring Technical Details 101
There are two key technical features in SharpSpring that enable it to send the right content to your
leads at the right time: Action Groups and Visual Workflow Automation.
What Are Action Groups?
Action Groups are a set of actions your leads complete - such as opening up an email - that trigger your desired response - such as watching a YouTube video linked in that email. You can group multiple actions together - such as opening a certain email and visiting a specific page on your website - so that you can pinpoint exactly where your leads are in your sales funnel.
How to Create an Action Group
To create an Action Group:
-
Select Automation from the SharpSpring toolbar, then choose Action Groups.
-
Click on the New Action Group option.
-
Name your Action Group, and save it to your desired Action Group folder. Alternatively, you can:
-
Create a time-based Action Group that has a custom date/time field.
-
Choose to make your created action available in the Contact Manager.
-
Make the action repeatable so that any lead can go through this action group multiple times.
-
-
Once you’ve made your selection, Add Action Group, then + Add > Action.
-
Next, select the Actions to Use in the visual Action Group, then click OK.
-
You can also add other desired options, including Actions, Filters, and Time Delays.
Inbound Marketing Expert Insight:
When you build the Action Group, focus it on a specific PoT (Point of Interest), for example, any contact who has an interest in a specific feature or part of your solution, will initiate this sequence which will include only Engagement Emails type. if there are other Emails types such as Knowledge, the Contact will redirect to another Action Group, in this strategy you can be more accurate on the messages and to whom you targeting the messages.
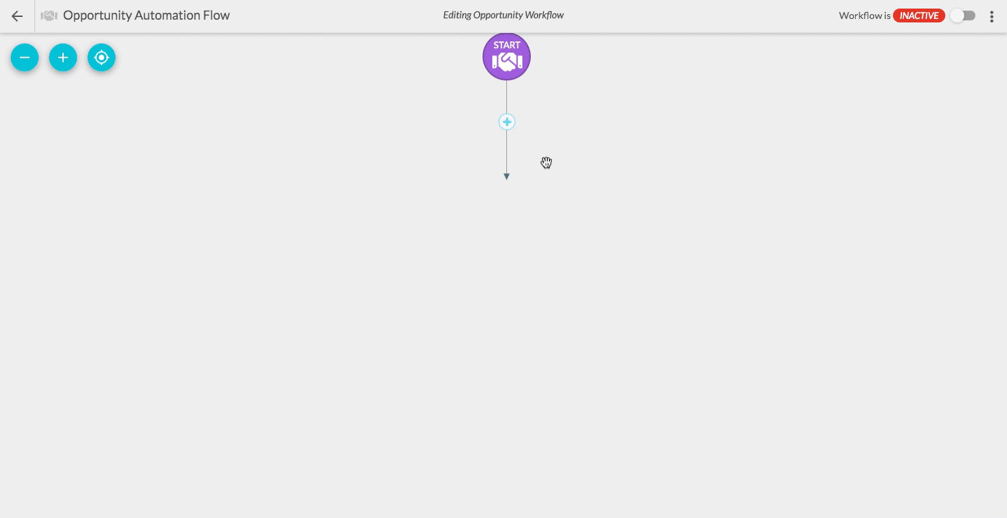
What is Visual Workflow Automation?
You can save Action Groups in SharpSpring. Once your lead has completed your saved set of actions, SharpSpring’s Visual Workflow Automation feature kicks in. This feature is triggered by the actions your leads take - such as filling out an online form or clicking a link to go to a specific landing page - and allows you to sequence emails that you send to them with content that is relevant to where they are in your sales funnel.
How to Create, Edit, and Add Triggers to Visual Workflows
To create a blank Visual Workflow:
-
From the SharpSpring toolbar, select Automation, then Visual Workflows.
-
Select New Visual Workflow, then name it and click OK.
To edit an existing Visual Workflow:
-
Go to the SharpSpring toolbar. Select Automation, then Visual Workflows.
-
In the Filter Workflows text box, type in the name of the Visual Workflow you wish to edit, then select it once it populates.
To add triggers to a Visual Workflow:
-
Go to the SharpSpring toolbar. Select Automation > Visual Workflows.
-
From here, you can either create a Visual Workflow or edit an existing one.
-
Once you have your desired Visual Workflow selected, go to Start and click + Add Trigger.
-
Select your desired Trigger, such as a lead filling out a form.
-
Once you’ve selected your desired Triggers, click OK.
Creating Compelling Content in SharpSpring
With SharpSpring it’s easy to create engaging digital content that accurately reflects your brand.
The platform allows you to:
-
Create native or third-party forms to capture lead data. To create a SharpSpring form:
-
Go to the SharpSpring toolbar and select Content > Forms.
-
Select Create Form, then name your form.
-
Select SharpSpring Form.
-
Choose your desired lead status, such as Open Lead or Qualified Lead, to assign the leads you want to fill out the form.
-
Select Continue.
-
Click the Field drop-down menu, and select the form fields you want to add to your SharpSpring form.
-
Select Save Changes.
-
Inbound Marketing Expert Insight:
SharpSpring Form creating an HTML code, use this on every web page, in this case, any engagement you will have will be registered directly on your Automation Platform, you will be able to allocate a score to the new Contact, assign to a Sales guy and initiate the right marketing funnel sequence- This is a vital step in order to build your Inbound Marketing Machine.
-
Use custom email templates to create your branded emails. To create a custom email template:
-
Go to the SharpSpring toolbar. Select Content > Email Template.
-
Click the Add Template button.
-
Name your template, and then click Add Template again.
-
Your next step is to add your Send Settings. From the left panel, select Send Settings, then enter a title and description for your custom email template.
-
In the left panel, click the Content and Layout option.
-
From here, you can choose either the Simple or Elements tab.
-
Next, drag and drop the email elements you want in your custom email template.
-
Once you’ve added your email elements, go back to the left panel, and select Theme Styles.
-
Modify the template fonts and colors as you desire. You can also edit the template HTML code by clicking More Options > View Code.
-
After you’ve made all your desired customizations, click Save Template.
-
Inbound Marketing Expert Insight:
Choose the right temple to your email, is one of the most important points in the process to create the email, in some case, the template and the structure of the emails are more crucial to the conversion rather than the wording itself.
Landing pages on your own without having to hire a web designer every time you need a new page on your websites, such as for a promotion, new product or service launch, or a YouTube video you want to highlight. To create a landing page in SharpSpring:
-
First, start by enabling a landing page site. To do so, go to User Settings > Settings from the SharpSpring toolbar.
-
From the left panel, select Sites under the Tracking header.
-
Click Options > Add Site.
-
Next, enter a Short Site Name, which can be a site name or label.
-
Under Site Type, select one of the following options:
-
Main Site
-
Microsite or Brochure
-
Blog or Informative
-
Help or Forum
-
Social
-
-
Under the Domain Name/URL section, enter your desired domain name. Remember, this will be visible to your leads in their web browser.
-
Select the Make Available in Landing Page Builder checkbox.
-
Click Add Site.
-
Now that you’ve enabled your landing page site, you can create your landing page. To do so, go to Content > Pages from the SharpSpring toolbar.
-
Selection Options > New Landing Pages.
-
Enter a funnel name and select a funnel domain.
-
Select the number of pages in the funnel and click Create Funnel.
-
From here, you can begin to customize your landing page by using the Content Editor to add blocks, layouts, and content elements.
How THE RiCH.agency Can Help You Implement SharpSpring?
As a SharpSpring Agency Partner, we know both how to implement SharpSpring for your company and create compelling inbound marketing content to engage your leads and convert them into paying customers and for every stage on their life cycle.
Even though you can purchase the SharpSpring ( Start as low as US $420/Month) as a SaaS model from us, you can think of us as your complete partner for both marketing your products and services and providing the technical knowledge to implement, manage, evaluate, and optimize your email marketing automation program and Inbound Marketing Machine as-a-whole.
Want to Learn More Before Getting Started?
Check Out Our Blogs for Everything About MAP